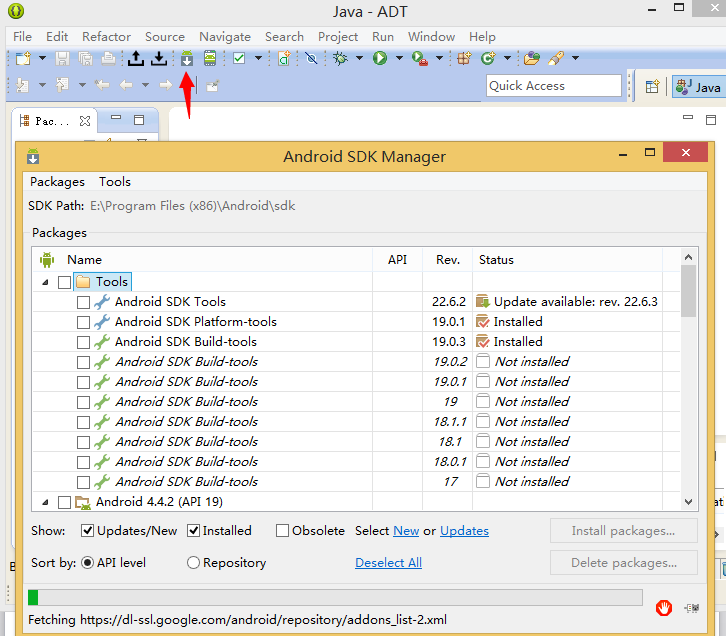
这里我使用的是谷歌安卓模拟器Android SDK,大家可以根据自己的系统来定,我使用的是window64系统,大家选择下载的时候可以注意一下,同时也是使用这个系统来演示。下载地址:http://developer.android.com/sdk/index.html
下载后,里面有SDK的manager.exe和其他文件夹。现在,我们建立一个模拟器,可以通过Android SDK管理器来创建我们的AVD(Android的虚拟设备); 这将是我们虚拟的Android手机。
1、设置安卓虚拟机如图
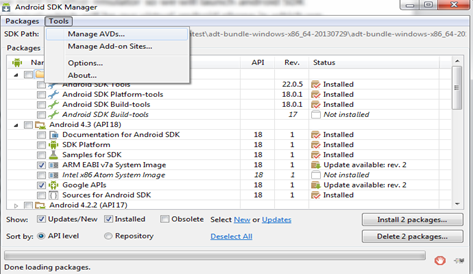
2、选择TOOLs下的Manager AVDS
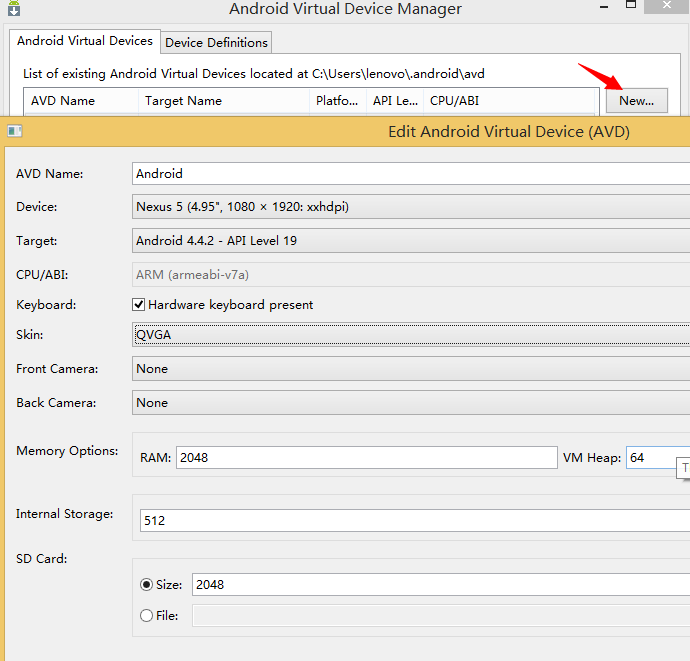
3、启动之后,设置如下配置
4、通过Start开启安卓虚拟机
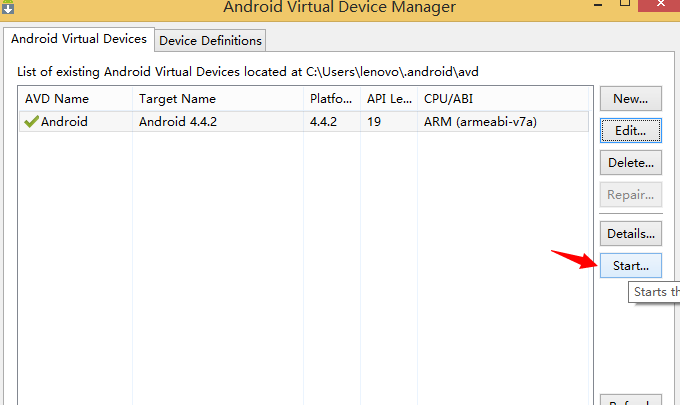
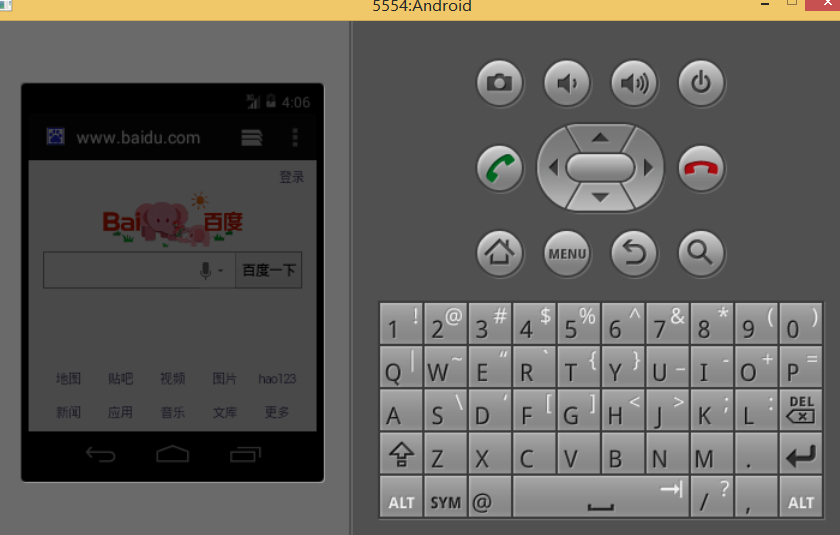
5、界面如图
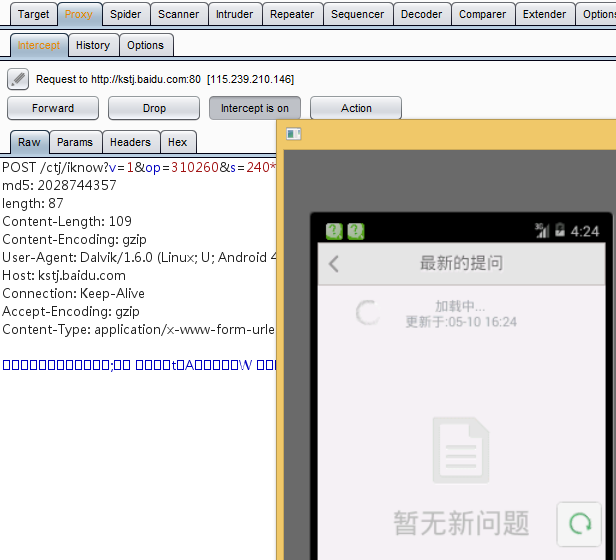
1、Burp代理设置如下
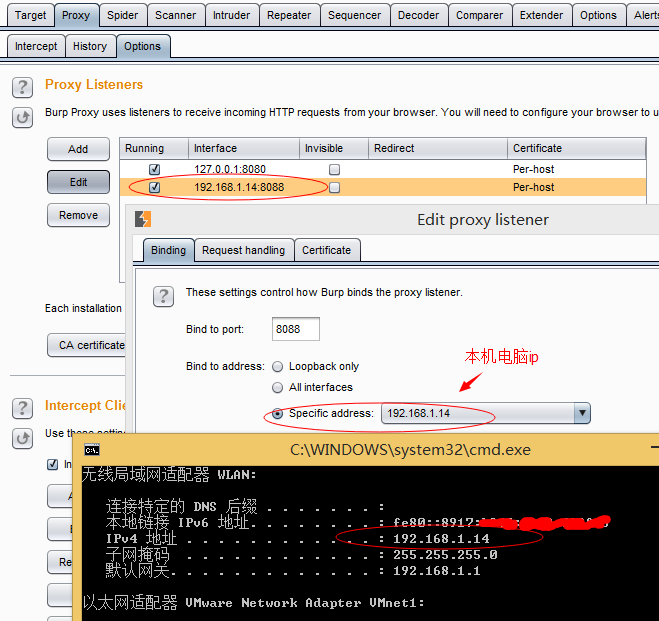
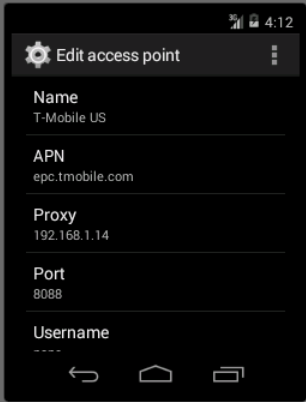
2、安卓模拟器设置,Menu>System setting>More>Mobile networks>Access Point Names> 选择默认的APN或者新建一个并且设置为默认代理
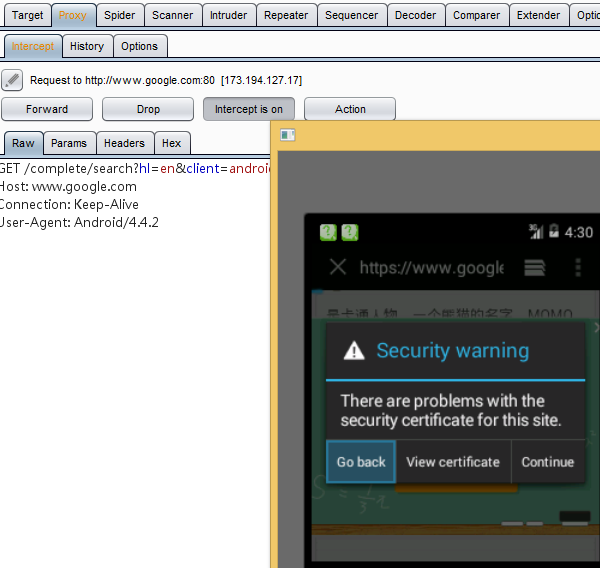
3、保存好了之后打开浏览器输入地址
最后附上刚下载的一个百度知道应用程序,也是可以抓包的
具体详情参考:http://resources.infosecinstitute.com/android-application-penetration-testing-setting-certificate-installation-goatdroid-installation/
首先安卓手机要跟电脑同一个网段,连接到同一个wifi下就可以了,我这里 网关是192.168.1.1 物理机 192.168.1.5 手机ip 192.168.1.2
1)手机设置: 打开手机-->设置->WLAN-->选择你的wifi进入编辑,在代理这里设置为手动,设置如下 主机名:192.168.1.5 //也就是我物理机的ip 端口:8088 保存即可。
2)Burp Suite设置

导入证书到手机中其实也很简单,就是把电脑上已经安装好的证书导出来到内存卡中,然后从内存卡中安装证书

然后命令为PortSwigger CA导出到桌面,复制到内存卡中步骤如下: 打开手机-->设置-->安全和隐私-->凭据存储-->从存储设备安装,选择你刚才证书存放的路径,安装即可。 如果安装好了,就可以在安全和隐私-->凭据存储-->受信任的凭据-->用户下即可查看到
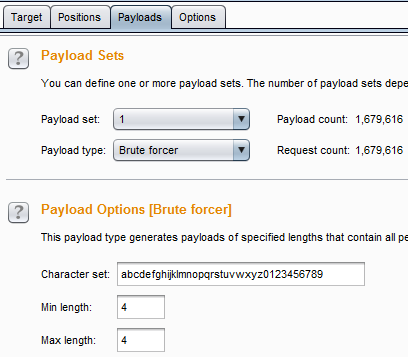
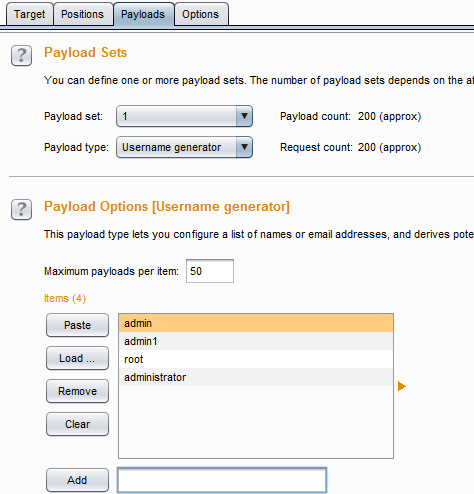
选择Payload type里的Brute forcer(暴力破解),在下面Payload options选项会出现组合的一些字母或数字,可以自己加,比如一些特殊字符什么的,生成的字段长度范围Min length-Max length,比如这里我只是需要4个,那就两个都写4。
根据提供的用户名然后进行拆分
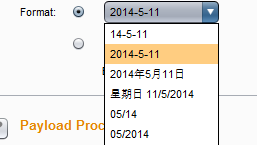
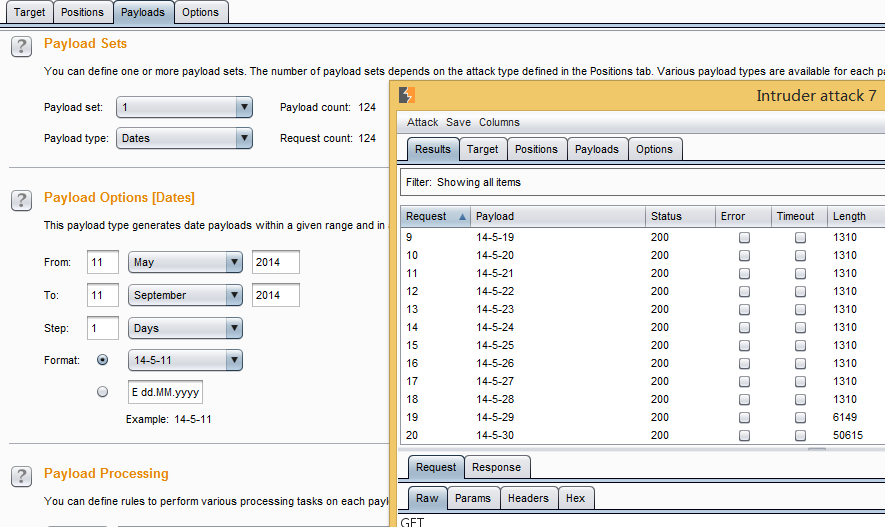
年月日都可以自己定义,有几种可选,如下
说白了就是第二个值会替换前一个值
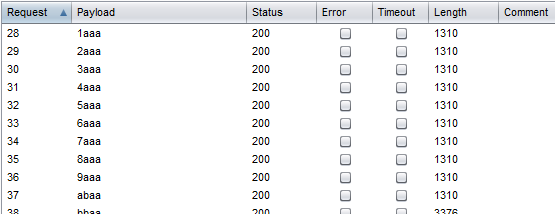
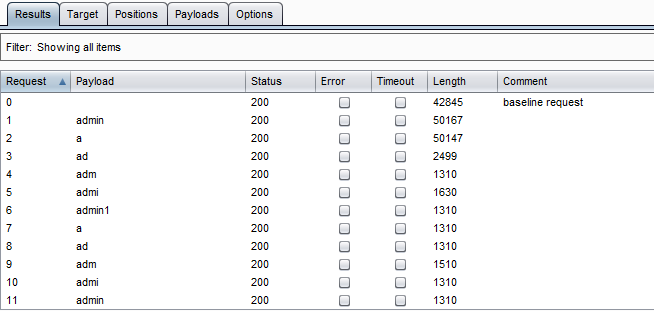
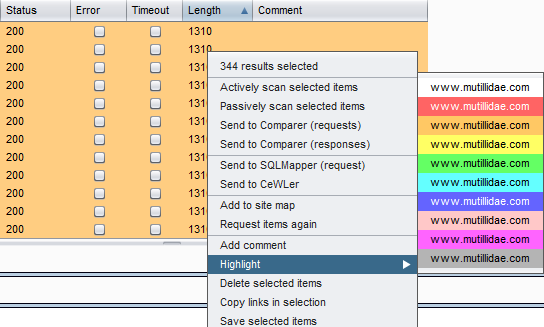
比如我想把Length为1310的数据导出来,则可以先对length排序下,然后选择length为1310的所有数据右击选择高亮(随便选择一种颜色,除了白色,默认情况是白色)
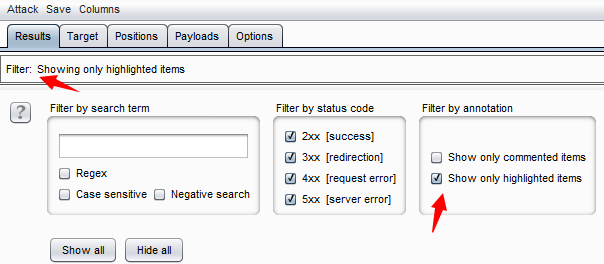
点击Filter,勾选show only highlighted items(表示显示仅仅显示高亮项)
同理也可以在上述步骤中选择添加注释(add commented),这里就应该选择show only commented items
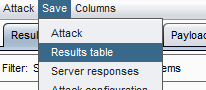
如满足以上操作,即可选择Save-->Result table,即弹出如下窗口
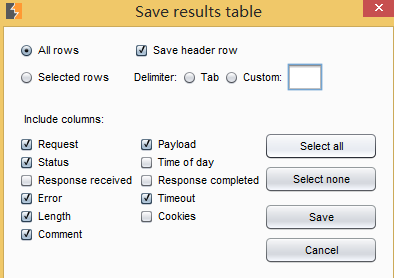
这里all rows是保存你所有选择的到的结果,selected rows是导出你选择的数据, Save header row如果勾选,则保存导航字段名,Delimiter表示字段之间以什么相隔开tab--一个tab键,Custom--自定义 下面有一些就是保存的时候需要保持什么就勾选,反之。
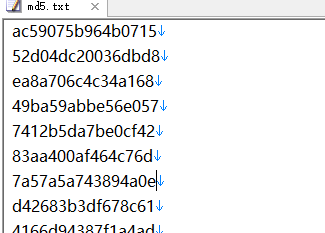
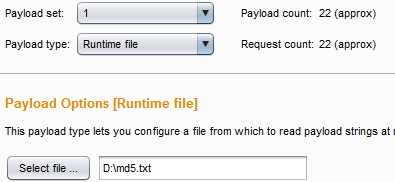
我们把需要爆破的md5值或者其他的需要爆破的同一放到一个txt文本里,这里我随便加密了几个放到里面
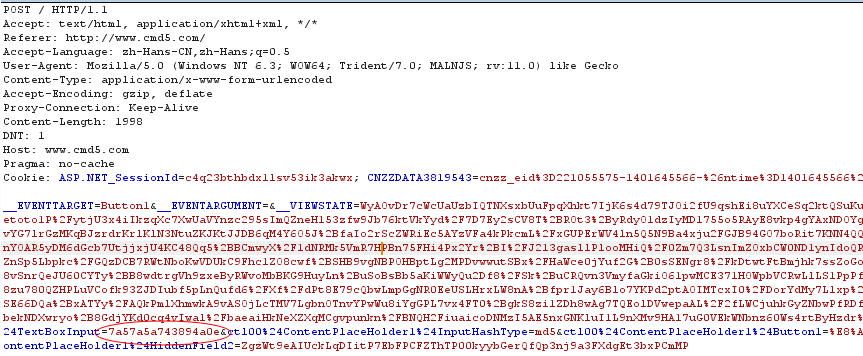
以www.cmd5.com网站为例做的批量解密 首先,还是同样的设置好代理之后访问www.cmd5.com,然后抓包
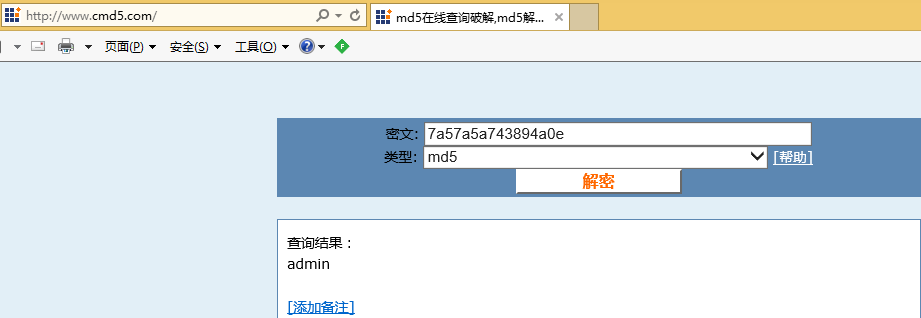
在密文处其实可以随便写什么,但是为了便于我们后面能够直接看出解密出的值我们还是写一个正常的。
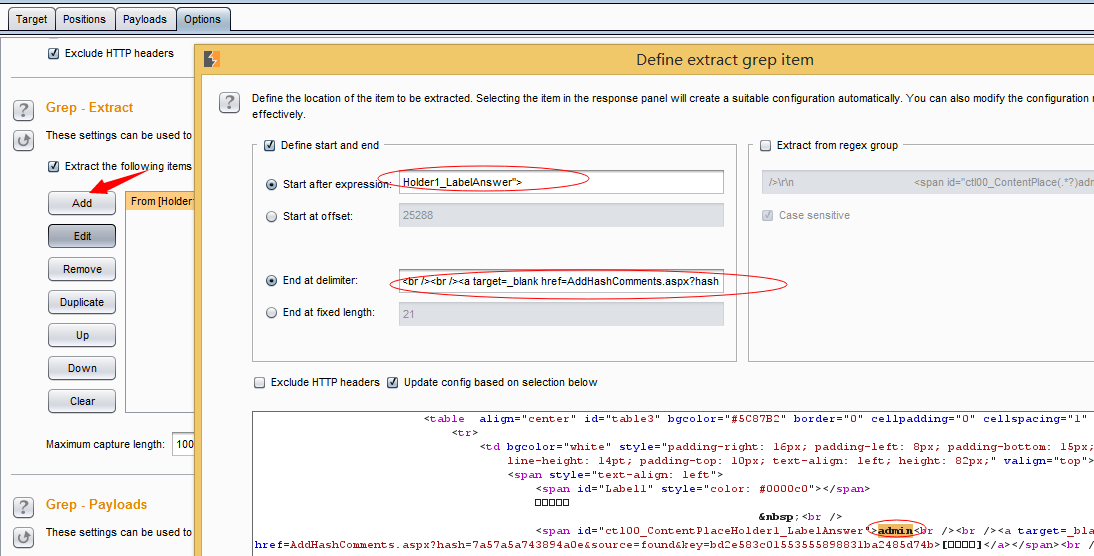
通过抓包到的数据我们可以看出我们填写的密文在哪
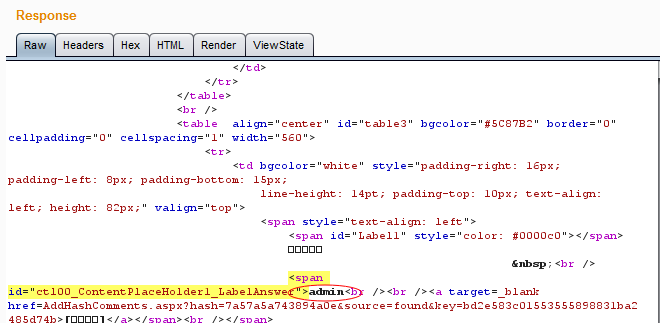
发送到repeat先,把我们想要的结果匹配到
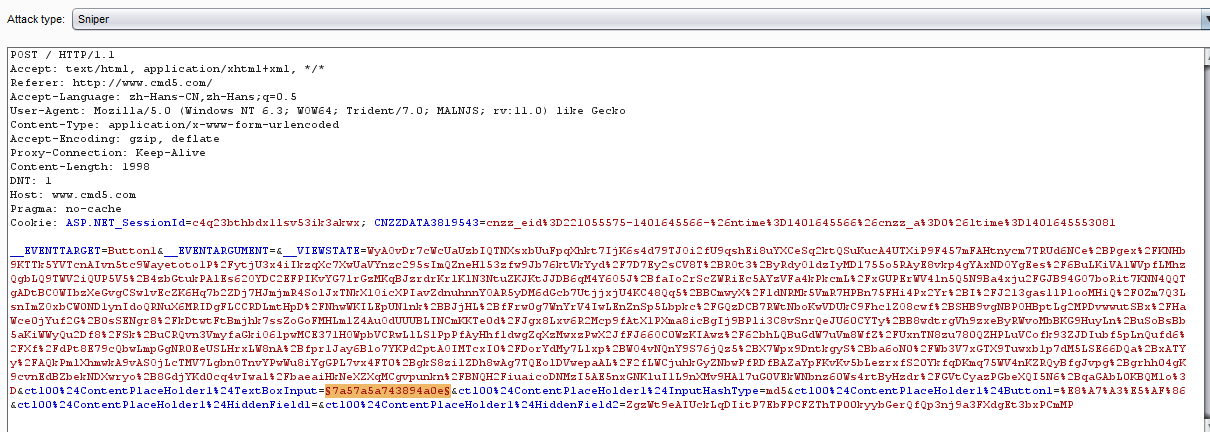
接着我们发送到intruder,设置我们输入的值两边加上$
选择字典
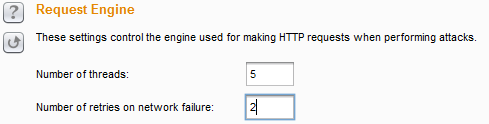
再调节一下线程,最好是调低一点,太高了可能会解密失败,而且设置解密失败重试2次最好了
匹配解密出的结果
点击start attack
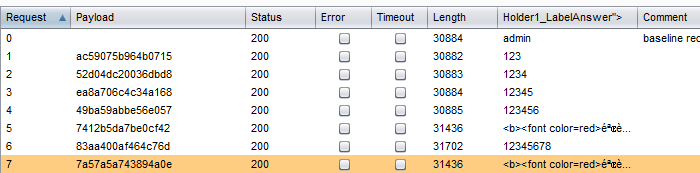
解密效果,后面导出就不用讲了,看过前面的应该就知道怎么导出想要的结果。